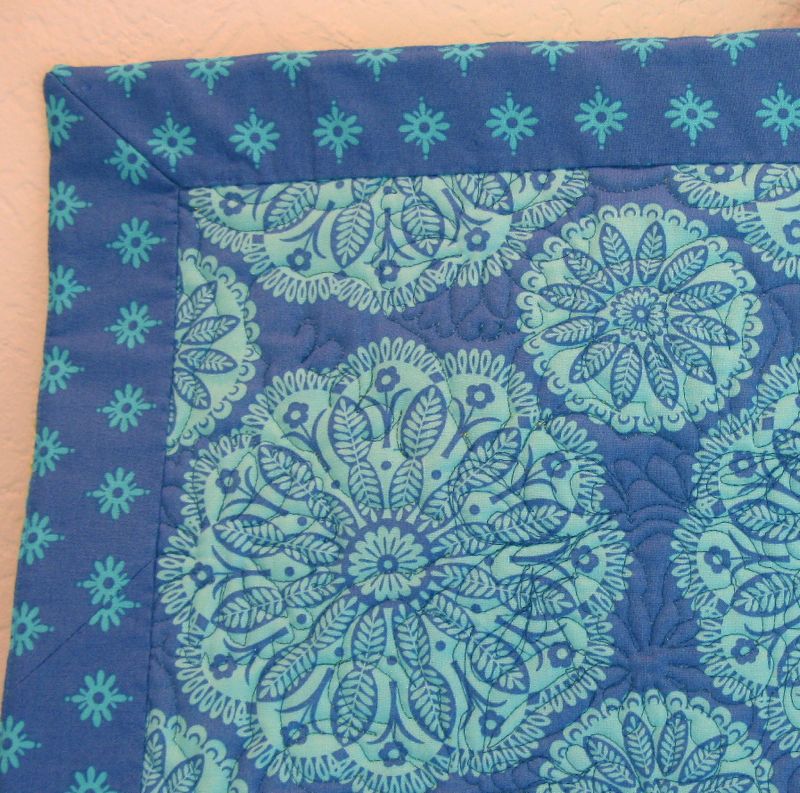
 A faced binding is applied to the front of your quilt and is wrapped to the back. If done well, it can’t be seen at all from the front, allowing the last border of your quilt to act as the frame for your quilt, and eliminating one last design element from your quilt. Often used on art quilts, when an additional line of a border would distract from the art, it can be also be used on our regular quilts.
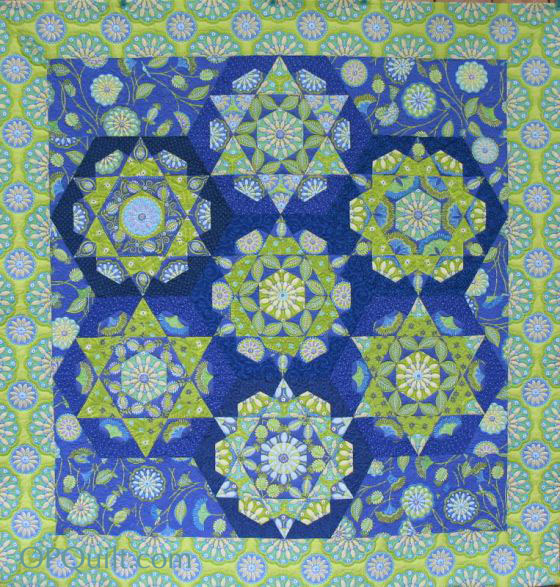
I used it on Kaleidoscope, as the printed border needed no other embellishment.
Step One: Prepare the quilt and strips
Trim the batting and edges of your quilt. In the best world, your trimmed line falls at the edge of your fabric. A little fudging here and there is okay.
For the binding, you’ll need four strips, one for each edge. Measure the edges of your quilt and add 10 extra inches to that measurement.

Cut 4″ wide strips for a medium- or large-sized quilt, and 3″ wide strips for smaller quilts.
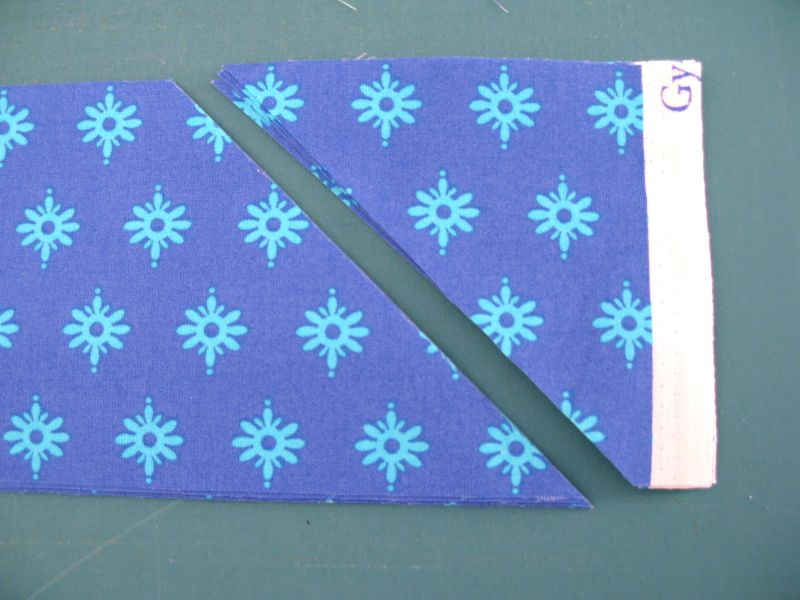
If you need to piece the strip to provide the right length, trim both ends at a right angle (make sure they are slanted the same way) and piece together on the bias. Fold the strip in half lengthwise and iron.
Step Two: Applying Binding Strips
Leaving a tail on each side of about 5 inches, pin the binding strip to the FRONT of your quilt, raw edges even, with the folded edge of the binding falling toward the quilt center, just like you would for a regular binding. Only this binding is giant-sized, and you won’t stitch around the corners continuously.
Continue pinning the strips onto each side. Pin the strip nearly to the end, as you’ll be leaving the last one-quarter-inch of each seam unsewn.
I measured one-quarter-inch from each corner edge, and placed a pin there to remind me to stop sewing.
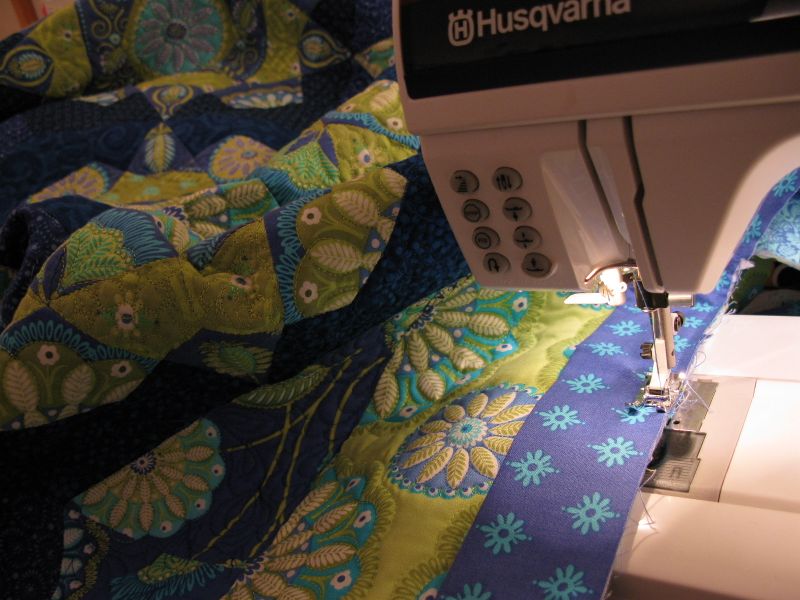
Stitch on the binding, using a quarter-inch seam allowance, and stopping at your placed pin, 1/4″ from the edge.
Step Three: Mitering the Corner
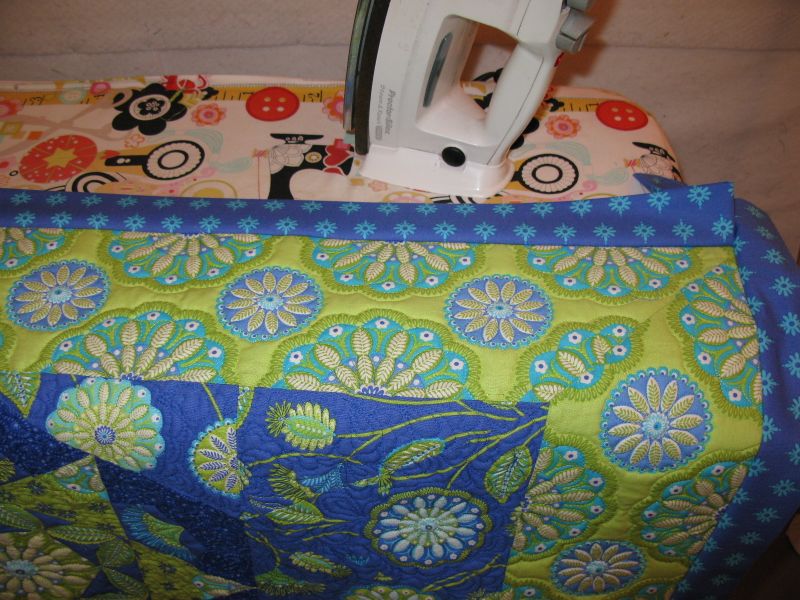
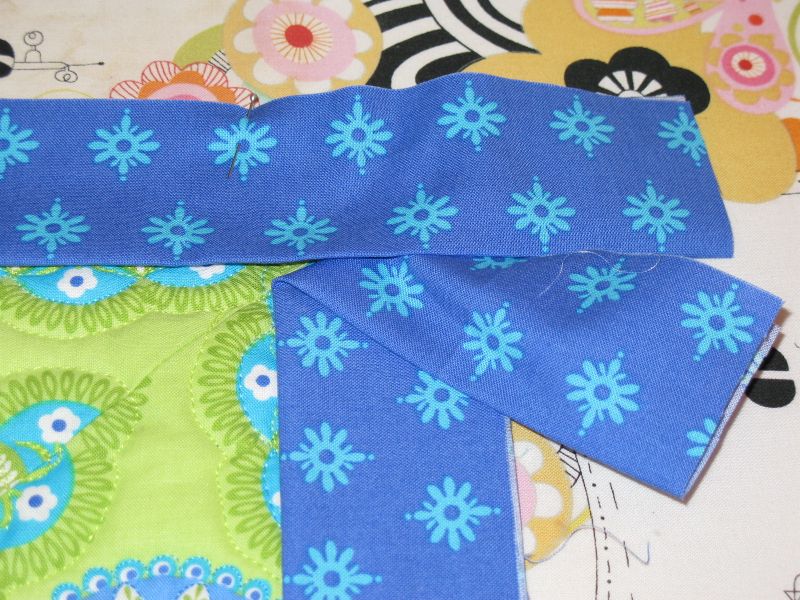
Take the quilt to your ironing board and using a light touch, press the binding strips away from your quilt.
Then lay the quilt so you can fold back the binding tails, as shown. Work to have a perfectly straight 45-degree angle on those folds where they meet; use a ruler to help you align it, if necessary. Press. The slight gap you see there between the folds is normal–the folds relax when you take the iron off. It’s better to have a slight gap than to have an overlap.
Another view, but this is just fingerpressed. While you can just fingerpress the folds, I think it’s better to get a hot iron on there so you can see the crease. (See next image.) Remember that you are pressing through double-folded fabric, so do a thorough job.
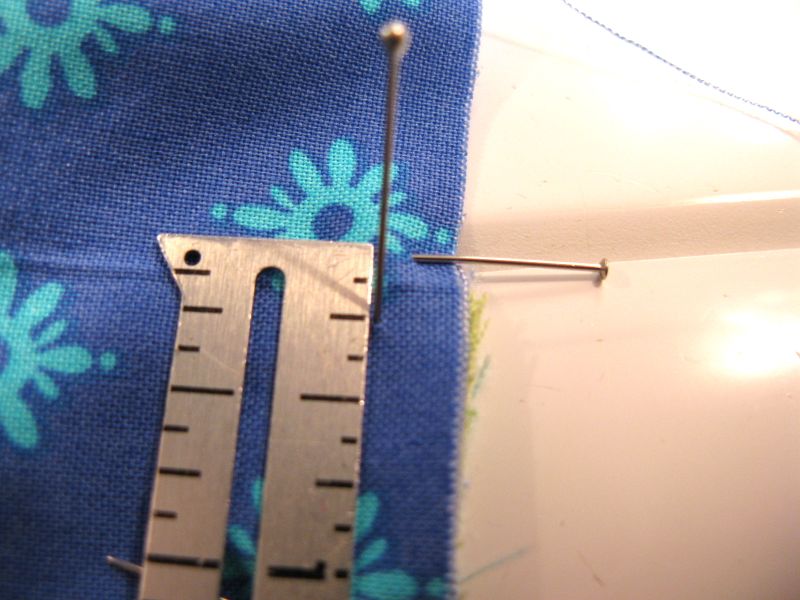
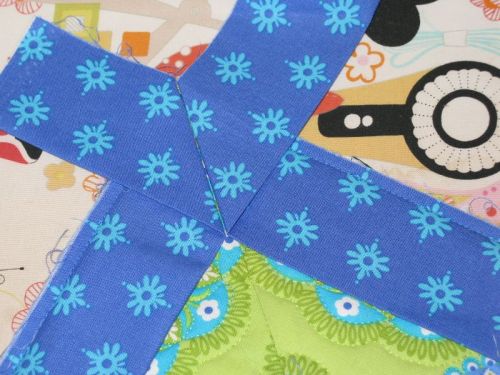
Unfold and align the binding strips for the first corner, making sure the pressed diagonal lines meet and folding the quilt down and out of the way. You are also making sure the top folded edges meet. I try not to pin this next seam to death, instead using only three pins:

• #1–Place a pin at the outer, folded edges of each binding strip and line the creases up.
• #2–Then go to the bottom, near where it’s joined to the quilt, and poke a pin from the top crease down into the bottom crease, lining them up.
• #3–Lastly, line up the creases at the center and place a pin there.
Again, you are pinning along the crease you made when you ironed in that beautiful miter at the ironing board.
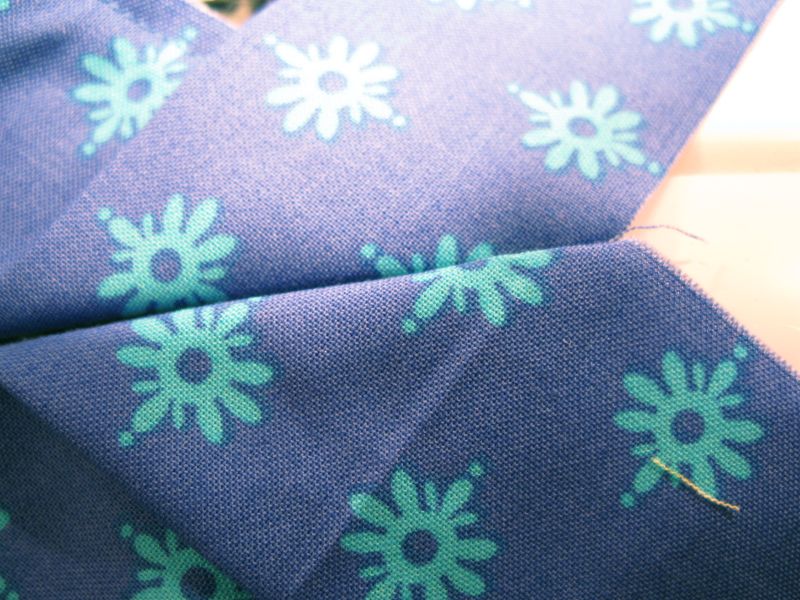
Stitch the seam. You’ll begin stitching from the folded, outer edges and sew back towards the quilt-binding seam (at the bottom of the picture). There’s really no need to “tack” by backstitching. So don’t. Just leave your thread tails long and you should be fine.
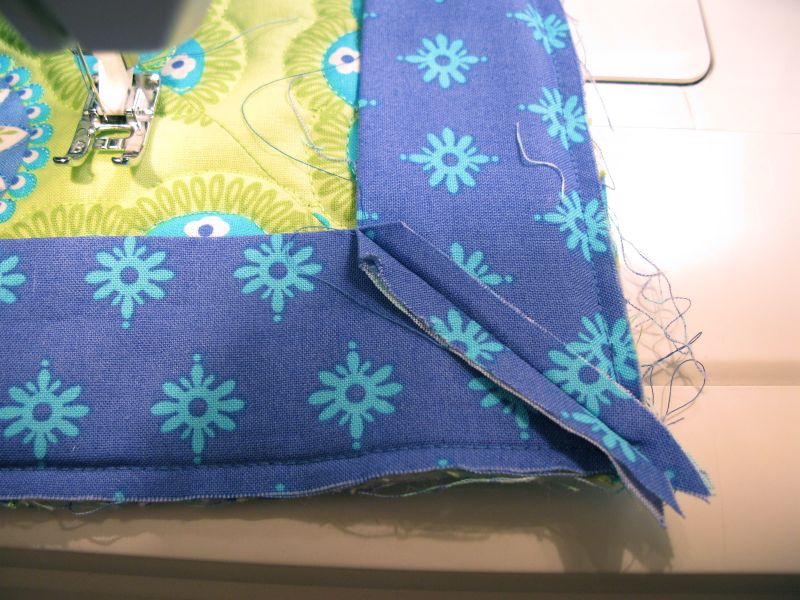
Trim the extra fabric to one-quarter-inch, as shown, then press the seam open.
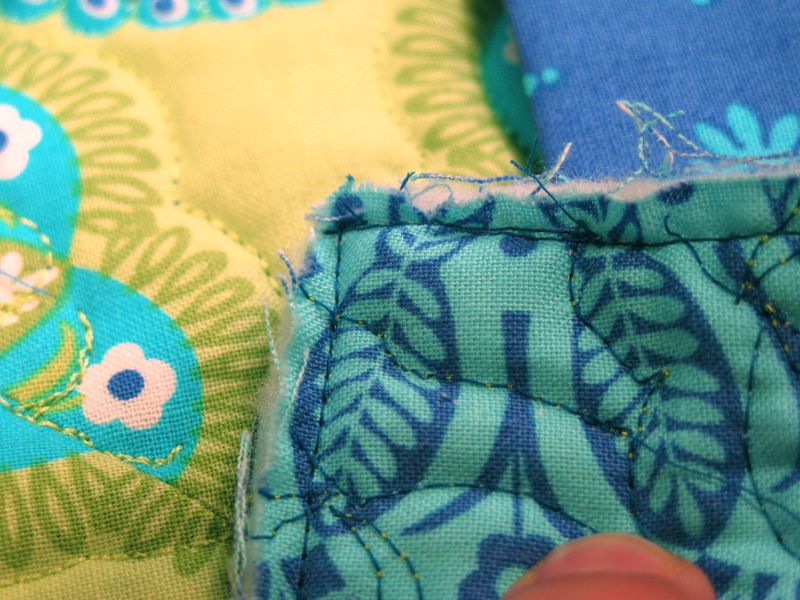
This is the backside of that mitered join up above. Notice how the seam allowances become smaller at the point? That’s because I trimmed them down to eliminate bulk. Trim out as much of the batting as you can, while making sure you don’t cut the stitching. Don’t skip this step. Just proceed carefully. (You will be fine.)
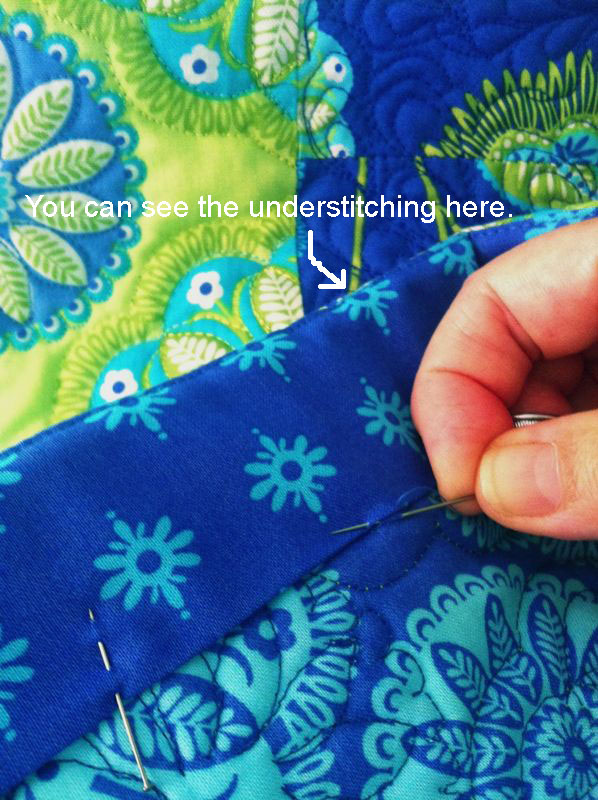
Step Four: Understitching
Often used when attached a facing to a neckline in dress-making, understitching is a technique to join the weensy seam allowances to the faced binding, which will keep them from rolling to the front and showing on your quilt.
First, since you pressed the binding away from the quilt up above, you’ve already started on this step. If you didn’t press at that time, do your best to press it now, going as far into the corner as your iron will allow.
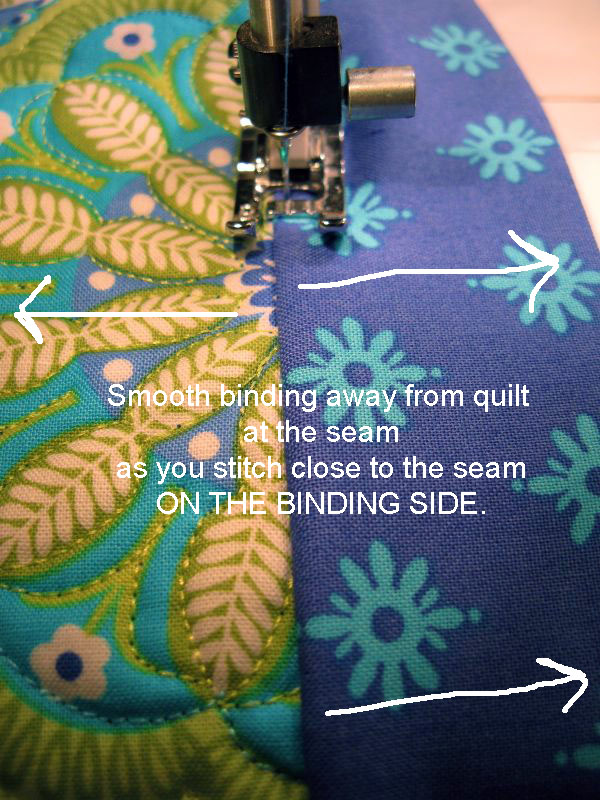
Line up your needle so you are just to the right of the binding seam. Stitch a straight line, smoothing the binding and the quilt away from the seam as you go, keeping a light tension on the quilt/binding fabric. Light. The success of understitching depends on not letting the binding bunch up toward the quilt, nor wandering in your stitching onto the quilt. Stay on the binding, smooth away the binding and it will go as smooth as butter.
Of course you can’t sew deep into the corner, so go as far as you can and cut the thread tails long. Now begin again on the next side. You’re almost there.
Step Five: Sewing down the Binding
Carefully turn the binding to the back of your quilt, giving it a quick press, if needed. Gently ease out the corners. If you are brave and not foolhardy, you can use a chopstick to help ease out the tip. But if you go too far, you’ll have a mess on your hands. Proceed gingerly.
If after turning, you think your corners are distorted and look like the tips of a witch’s shoe, a little pulling at the side edges, just below the tip, will shorten that tip and bring it back into shape. Set it with a little shot of steam from your iron, then press it with your fingers or a piece of wood until it cools. Seamstresses use “clappers,” or smoothed wooden tools just for this purpose. However, it’s better to lay a piece of cloth down and put your tender fingers on that, that to smash the heck out of it with a hot iron. Never over-iron your quilts, or blocks, for that matter! A horribly flattened block means that, to me, someone has decided to start wearing out their quilts early.
You’ll stitch the binding down by hand, just as you do a regular quilt binding. Now you can clip those long thread tails on the top of the binding as you come to them. Tuck the long tails that are on the backside of the binding up inside–no need to trim those. If you find your miter is buckling just a little and has too much fabric, with your handsewing needle take a small tuck and secure it with tiny stitches.
All done!
This is what the binding looks like from the back, when finished.

And this is the binding from the front–invisible!
Note: If you need to attach a quilt sleeve for hanging, you’ll create your tube of fabric and stitch it on now, aligning the top edge 1/2″ to 3/4″ down from the top, and leaving a slight bulge in the sleeve to leave room for the hanging rod.
˚˚˚˚˚˚˚˚˚˚˚˚˚˚˚˚˚˚˚˚˚˚
Return to OccasionalPiece-Quilt (or OPQuilt.com)


This is such a great tutorial, thank you again for putting it in the FAL tutorial series too.
Beautiful quilt and great tutorial. Thanks for sharing Marie
Thank you for this clearly written and excellent tutorial, Elizabeth. I had not thought about binding a quilt this way until I read this post. Do you use primarily for quilts you will hang or if you also use it for bed quilts. I can imagine the binding as an additional design element on the back of a quilt. Thanks again for sharing your method.
I’m so glad you did this tutorial. I haven’t used this method yet but know I will at some point. It was the perfect choice for your quilt.
Beautiful quilt! I love it.
Great tutorial too. I just used this for the first time recently.
Wow, that is an awesome way to bind! TY for such a good tutorial! I will have to try this someday.
Thank you so much for this tutorial! I did my first faced binding today following your instructions. I just need to hand stitch it down tomorrow and photograph… 🙂
Elizabeth, this is the perfect refresher tutorial for facing bindings. Good photos.
I found the link on the IEMQG website.